 My latest application, Tap That! Number uses the ScoreNinja library to integrate global high scores. This library is very easy to include with only a few lines of code. Other solutions such as ScoreLoop try to bundle a full social framework, but ScoreNinja does just one thing – global high scores. In this post I’ll teach you how to integrate ScoreNinja into your own Android app.
Getting Started
To begin, download the ScoreNinja library from http://scoreninja.appspot.com/. This is a JAR file named something like “scoreninja-1.2.jar” which you’ll need to include in your Android project. There are two ways to do this:
- link to the file directly where you downloaded it (external reference), or
- import the library into your project (internal reference)
If you’re using a single machine for development, the first method is easiest. However, if you’re developing on multiple machines I recommend copying the JAR file into your project folder. This way it will be available even if you move the original file from where it was downloaded, or if you change machines. Assuming you want to copy the JAR file into your project, follow the instructions below:
- Right click your Eclipse project, and choose “New > Folder”
- Enter “lib” as the new folder name, and click “Finish”
- Right click the new folder, and choose “Import…”
- Select “General > Filesystem”, and click Next
- Find the directory you downloaded ScoreNinja to, and tick the box next to the JAR file to select it for import
- Click “Finish”

Now the JAR file is imported into your project, you can add a reference:
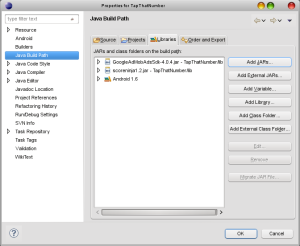
- Right click your Eclipse project, and choose “Properties”
- Select “Java Build Path”, and choose the “Libraries” tab
- On the right, click “Add JARS…”
- Browse to and select the ScoreNinja JAR file within your project
Once you’ve completed these steps, the ScoreNinja library will be included in your project, and it should build successfully.
Signing Up
To use ScoreNinja, you have to sign up for an API key. This is a relatively painless process, and simply involves choosing a “Game Name” (which will be shown to the user) and an “App ID” which is used within the code to identify your app. Be careful though – you can’t change these later, and if you lose your private key the only option is to register again under a different name.
Using the API
Once you’ve integrated the ScoreNinja library, and signed up for an API key, you’re ready to start writing code! ScoreNinja provides some basic sample code, which is listed below:
public class MyGame extends Activity {
    private ScoreNinjaAdapter scoreNinjaAdapter;

    @Override
    protected void onCreate(Bundle savedInstanceState) {
      ...
      scoreNinjaAdapter = new ScoreNinjaAdapter(
          myContext, "yourChosenAppId", "yourGeneratedPrivateKey");
    }

    // Unfortunate API, but you must notify ScoreNinja onActivityResult.
    @Override
    protected void onActivityResult(
        int requestCode, int resultCode, Intent data) {
      super.onActivityResult(requestCode, resultCode, data);
      scoreNinjaAdapter.onActivityResult(
          requestCode, resultCode, data);
    }

    void onGameOver() {
     /**
      * Display the top 10 list with the given new score. If the newScore is in the
      * top 10, the user will be prompted to enter their name and comments.
      * Otherwise the user's ranking will be displayed at the bottom of the top 10.
      * If the com.scoreninja package is not installed, the user will be prompted
      * to install it when this constructor is invoked.
      *
      * @param newScore The most recent score achieved by the user.
      * @param titleText If non-null, the text to display in the title bar of the
      *          window.
      * @param subBoard If non-null, an arbitrary name of a sub-board to display
      *          and apply this newScore to if it qualifies. This can be used to,
      *          for example, create a separate board for "easy", "medium", "hard".
      */
      scoreNinjaAdapter.show(playersNewScore);
    }
  }

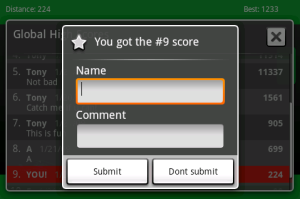
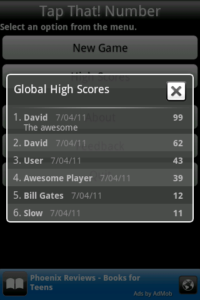
This code can easily be adapted to suit your own application. Simply initialise the ScoreNinja adapter when your activity loads, and when the game is finished, call the show() method with the player’s score. This will present a dialog containing the global high scores, and if necessary prompt for the player’s name and a comment if they set a new record.
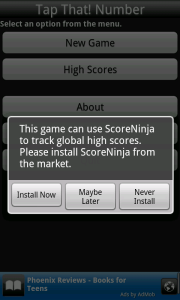
If the ScoreNinja app is not already installed, it will prompt the player to download it from the Android Market (see screenshot). This only takes about a minute.
There is one undocumented feature that I discovered. In order to display the high scores, you must pass a new score to the show() function. It cannot be called without any argument being passed. So what happens if you don’t want to play a game, but simply want to show the current high score list?
It turns out that if you pass “-1” (negative one) as the player’s score, ScoreNinja will show the global high score list without highlighting and displaying the current player’s score. This is handy if you want to link directly to the high scores from your Main Menu. For example, in Tap That! Number I use the following code for one of the main menu buttons:
Button btnHighScores = (Button)findViewById(R.id.btnHighScores);
btnHighScores.setOnClickListener(new OnClickListener() {
    @Override
    public void onClick(View v) {
        ScoreNinjaAdapter scores = new ScoreNinjaAdapter(v.getContext(), "appid", "privatekey");
        scores.show(-1, null, Integer.toString(appState.getGameSize()));
    }
});

Conclusion
Hopefully this guide has helped you integrate ScoreNinja into your Android app. It’s a great simple solution if you want to include global high scores without much effort.
If you have any further questions about ScoreNinja integration, or if this article was helpful in any way, please let me know either by email or in the comments. Your feedback is appreciated!